🏡 Introduction
Most prior end-to-end navigation approaches rely on separate localization modules that require accurate sensor extrinsic calibration for self-state estimation, limiting their generalization across different robot embodiments and environments. To address this, we introduce LoGoPlanner, a localization-grounded, end-to-end navigation framework that advances the field by:
- Finetuning a long-horizon visual-geometry backbone to ground predictions with absolute metric scale, enabling implicit state estimation for accurate localization.
- Reconstructing surrounding scene geometry from historical observations to provide dense, fine-grained environmental awareness for reliable obstacle avoidance.
- Conditioning the policy on implicit geometry bootstrapped by the above auxiliary tasks, thereby reducing error propagation and improving robustness.
💻 Simulation
🛠️ Installation
We use the same environment as NavDP. Please follow the installation instructions from NavDP to configure the environment:
conda activate navdp
Then install the required packages for the visual geometry model Pi3:
cd baselines/logoplanner
pip install plyfile huggingface_hub safetensors
🤔 Run the LoGoPlanner Model
Navigate to baselines/logoplanner and run the following command to start the server:
python logoplanner_server.py --port ${YOUR_PORT} --checkpoint ${SAVE_PTH_PATH}
📊 Evaluation
Open a new terminal and run the evaluation script from the {NavDP_HOME} directory:
conda activate isaaclab
python eval_startgoal_wheeled.py --port {PORT} --scene_dir {ASSET_SCENE} --scene_index {INDEX} --scene_scale {SCALE}
😉 Example
# Start the server
conda activate navdp && python logoplanner_server.py --port 19999 --checkpoint logoplanner_policy.ckpt

# Evaluate on scenes_home
conda activate isaaclab && python eval_startgoal_wheeled.py --port 19999 --scene_dir scenes_home --scene_index 0 --scene_scale 0.01

# Evaluate on cluttered_hard
conda activate isaaclab && python eval_startgoal_wheeled.py --port 19999 --scene_dir cluttered_hard --scene_index 0 --scene_scale 1.0
🤖 Real-Robot Deployment
Lekiwi is a fully open-source robotic car project developed by SIGRobotics-UIUC. It includes detailed 3D printing files and operation guides, designed to be compatible with the LeRobot imitation learning framework. It also supports the SO101 robotic arm for a complete imitation learning pipeline.
🛠️ Hardware
Compute
- Raspberry Pi 5
- Streaming to a laptop
Drive
- 3-wheel Kiwi (holonomic) drive with omni wheels
Robot Arm (Optional)
Sensors
- RGBD camera (e.g., Intel RealSense D455)
1️⃣ 3D Printing
Parts
SIGRobotics provides ready-to-print STL files for the 3D-printed parts listed below. These can be printed with generic PLA filament on consumer-grade FDM printers. Refer to the 3D Printing section for more details.
| Item | Quantity | Notes |
|---|---|---|
| Base plate Top | 1 | |
| Base plate Bottom | 1 | |
| Drive motor mount | 3 | |
| Servo wheel hub | 3 | Requires supports1 |
| Servo controller mount | 1 | |
| 12V Battery mount or 12V EU Battery mount or 5V Battery mount | 1 | |
| RasPi case Top | 1 | 2 |
| RasPi case Bottom | 1 | 2 |
| Arducam base mount and wrist mount | 1 | Compatible with this camera |
| Webcam base mount, gripper insert, and wrist mount | 1 | Compatible with this camera |
| Modified Follower Arm Base | 1 | Use tree supports. Optional but recommended if you have not built the SO-100 arm |
| Follower arm | 1 | |
| Leader arm | 1 |
2️⃣ Assembly
Refer to the Assembly guide for detailed instructions.
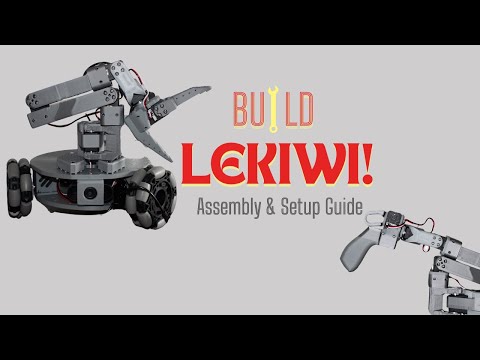
We also recommend the following detailed tutorial from seeedstudio and its accompanying video series:
3️⃣ Installation
Install LeRobot on Raspberry Pi
-
Install Miniconda
mkdir -p ~/miniconda3 wget https://repo.anaconda.com/miniconda/Miniconda3-latest-Linux-aarch64.sh -O ~/miniconda3/miniconda.sh bash ~/miniconda3/miniconda.sh -b -u -p ~/miniconda3 rm ~/miniconda3/miniconda.sh -
Restart Shell Run
source ~/.bashrc(orsource ~/.bash_profilefor Mac, orsource ~/.zshrcfor zsh). -
Create and Activate Conda Environment
conda create -y -n lerobot python=3.10 conda activate lerobot -
Clone LeRobot
git clone https://github.com/huggingface/lerobot.git ~/lerobot -
Install FFmpeg
conda install ffmpeg -c conda-forge -
Install LeRobot with LeKiwi Dependencies
cd ~/lerobot && pip install -e ".[lekiwi]"
Install LeRobot on Laptop/PC
Follow the same steps as above for the Raspberry Pi installation.
Install RealSense SDK on Raspberry Pi
Refer to this guide.
-
Check System Version
uname -a -
Increase Swap Size
sudo vim /etc/dphys-swapfile # Set CONF_SWAPSIZE=2048 sudo /etc/init.d/dphys-swapfile restart swapon -s -
Install Required Packages
sudo apt-get install -y libdrm-amdgpu1 libdrm-dev libdrm-exynos1 libdrm-freedreno1 libdrm-nouveau2 libdrm-omap1 libdrm-radeon1 libdrm-tegra0 libdrm2 sudo apt-get install -y libglu1-mesa libglu1-mesa-dev glusterfs-common libglui-dev libglui2c2 sudo apt-get install -y mesa-utils mesa-utils-extra xorg-dev libgtk-3-dev libusb-1.0-0-dev -
Update Udev Rules
cd ~ git clone https://github.com/IntelRealSense/librealsense.git cd librealsense sudo cp config/99-realsense-libusb.rules /etc/udev/rules.d/ sudo udevadm control --reload-rules && udevadm trigger -
Build and Install librealsense
cd ~/librealsense mkdir build && cd build cmake .. -DBUILD_EXAMPLES=true -DCMAKE_BUILD_TYPE=Release -DFORCE_LIBUVC=true make -j1 sudo make install -
Install Python Bindings
cd ~/librealsense/build cmake .. -DBUILD_PYTHON_BINDINGS=bool:true -DPYTHON_EXECUTABLE=$(which python3) make -j1 sudo make install -
Add to Python Path Edit
~/.zshrc(or your shell config file) and add:export PYTHONPATH=$PYTHONPATH:/usr/local/libThen run
source ~/.zshrc. -
Test the Camera
realsense-viewer
4️⃣ Motor Configuration
To identify the port for each bus servo adapter, run:
lerobot-find-port
Example output:
Finding all available ports for the MotorBus.
['/dev/ttyACM0']
Remove the USB cable from your MotorsBus and press Enter when done.

[...Disconnect the corresponding leader or follower arm and press Enter...]

The port of this MotorsBus is /dev/ttyACM0
Reconnect the USB cable.
Note: Remember to disconnect the USB cable before pressing Enter, otherwise the interface may not be detected.
On Linux, grant access to the USB ports:
sudo chmod 666 /dev/ttyACM0
sudo chmod 666 /dev/ttyACM1
Run the following command to set up the motors for LeKiwi. This will configure the arm motors (IDs 6–1) followed by the wheel motors (IDs 9, 8, 7).
lerobot-setup-motors \
    --robot.type=lekiwi \
    --robot.port=/dev/ttyACM0  # Use the port found in the previous step
5️⃣ Teleoperation
SSH into your Raspberry Pi, activate the conda environment, and run:
python -m lerobot.robots.lekiwi.lekiwi_host --robot.id=my_awesome_kiwi
On your laptop (also with the lerobot environment active), run the teleoperation example after setting the correct remote_ip and port in examples/lekiwi/teleoperate.py:
python examples/lekiwi/teleoperate.py
You should see a connection message on your laptop. You can then:
- Move the leader arm to control the follower arm.
- Use W, A, S, D to drive forward, left, backward, right.
- Use Z, X to turn left/right.
- Use R, F to increase/decrease the robot speed.
6️⃣ Deployment Preparation
Mount the RGBD camera onto LeKiwi and adjust the SO101 arm to avoid obstructing the camera view.
Tip: Before running the navigation algorithm, test the robot by having it follow simple trajectories (e.g., a sine wave or "S" curve) to ensure the MPC tracking is working correctly.
7️⃣ Deploy LoGoPlanner
On your laptop or PC, start the LoGoPlanner server:
python logoplanner_realworld_server.py --port 19999 --checkpoint ${CKPT_PATH}
Verify the server IP address:
hostname -I
On the Raspberry Pi, copy lekiwi_logoplanner_host.py to your working directory and run the client:
conda activate lerobot
python lekiwi_logoplanner_host.py --server-url http://192.168.1.100:8888 --goal-x 10 --goal-y -2
The robot will navigate to the target coordinates (10, -2). Without any external odometry module, it will use its implicit localization to reach the goal and stop.
Footnotes:
1: Requires 3D printing supports.
2: Raspberry Pi case parts.